


Removing car wraps is an essential process for vehicle owners who wish to restore their car’s original look or prepare it for a new design. The correct removal technique helps in preserving the underlying paint, preventing damage that could lead to costly repairs and a diminished aesthetic value.
Car wrap removal can seem daunting, but with the right tools and methods, it can be done safely and easily. Proper preparation is key; this includes gathering necessary supplies and ensuring that the environment is conducive to a smooth removal process. Understanding the adhesive properties of the wrap and how they interact with the paint is crucial for achieving optimal results without harming the vehicle’s finish.
In this article, we will explore various methods for car wrap removal, discuss best practices, and provide tips to ensure that you can confidently undertake this project while maintaining your car’s pristine paint condition.
Choosing the Right Tools for Car Wrap Removal
When it comes to removing car wraps, selecting the appropriate tools is crucial for achieving successful results while safeguarding the underlying paint. A careful approach will minimize the risk of damage to the vehicle’s surface and ensure a smooth removal process.
One of the essential tools for wrap removal is a heat gun. This tool helps to loosen the adhesive bond between the wrap and the car’s surface, making it easier to peel off the material. Ensure to keep the heat gun at a safe distance to prevent overheating and damaging the paint.
A quality vinyl removal tool is also important. These tools are specifically designed to lift and separate the wrap from the vehicle without scratching or harming the paint. Look for tools with a soft edge to maintain the integrity of the surface.
In addition to these primary tools, you may require a utility knife or blade for cutting the wrap into manageable sections. Carefully use this tool to minimize any accidental nicks to the vehicle’s paint during the process.
Cleaning solutions are an important consideration as well. After the wrap is removed, using an adhesive remover can help to eliminate any residual glue left behind without affecting the car’s paint. Opt for products that are safe for automotive surfaces and follow the manufacturer’s instructions for best results.
Lastly, a microfiber cloth is a useful addition to your toolkit. It can be used to buff the surface after cleaning, ensuring that the paint remains pristine and free of scratches. This careful preparation and the right selection of tools can greatly enhance the efficiency and safety of your car wrap removal project.
Step-by-Step Process for Safe Wrap Detachment
Removing a car wrap requires careful attention to prevent damaging the underlying paint. Following a systematic approach ensures a smooth removal process. Begin by gathering essential tools: a heat gun or hairdryer, a utility knife, a soft cloth, and a solvent specifically formulated for vinyl.
Start by preparing the car. Park it in a well-lit, temperature-controlled area to facilitate the removal process. Higher temperatures make the vinyl more pliable, allowing for easier detachment. If the vehicle has been exposed to direct sunlight, it may already be warm enough.
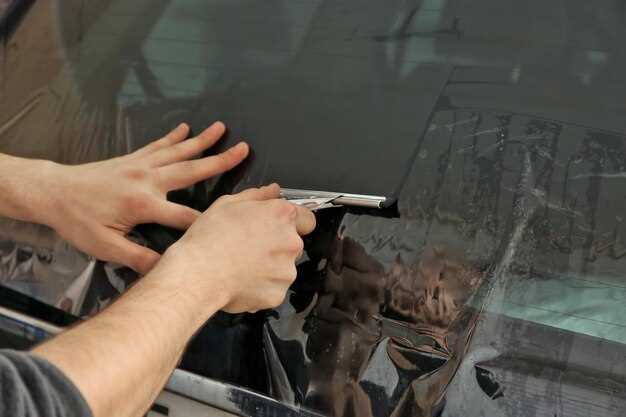
Next, use the heat gun or hairdryer to gently warm a corner of the wrap. This softens the adhesive, making it simpler to peel off. Start at an edge, gradually working your way along the wrap. Avoid overheating, as excessive heat can damage the car’s paint.
As you lift the wrap, maintain a steady angle–approximately 45 degrees is ideal. This angle helps in minimizing adhesive residue left on the surface. If resistance is felt, apply more heat to that area before continuing. Patience is key during this stage to prevent tear or stretch of the vinyl.
If adhesive remains on the paint after removing the wrap, use a solvent to dissolve it. Apply a small amount onto a soft cloth and gently rub the affected areas. Test the solvent on an inconspicuous section first to ensure it does not harm the paint.
Finally, clean the entire surface with a mild car wash soap to remove any leftover residue and restore the car’s shine. Inspect the paint to confirm that no damage has occurred during the removal process. By following these steps, you can safely detach a car wrap while preserving the integrity of the paint underneath.
Protecting Your Car’s Paint During Wrap Removal
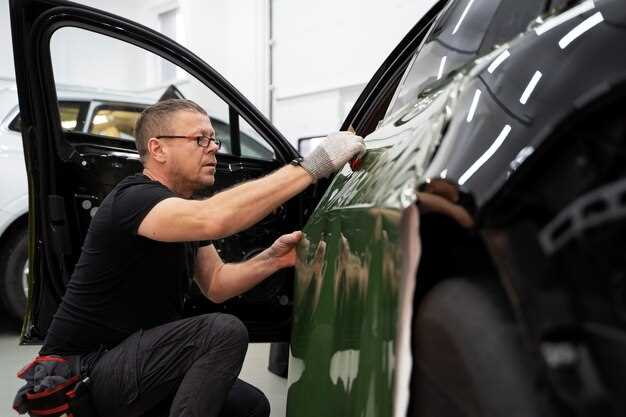
When it comes to the removal of a car wrap, ensuring the safety of your vehicle’s paint is paramount. Improper techniques can lead to scratches, peeling, or even damage to the underlying surface. Here are some essential tips for a safe wrap removal process.
First and foremost, always work in a controlled environment. A temperature-controlled garage or shaded area is ideal, as heat can make the wrap adhesive easier to manage. Using a heat gun or steamer set on low can help soften the adhesive, allowing for smoother removal. Be cautious not to overheat the paint, as excessive heat can actually damage it.
Before starting, thoroughly clean the car’s surface. Dirt and debris can cause abrasions during the wrap removal. Use a gentle car wash solution and soft microfiber cloths to ensure the car is spotless. This action reduces the chance of grit causing scratches on the paint while you’re working.
During the removal process, peel the vinyl slowly and at a low angle. This technique helps minimize the stress on the paint and reduces the likelihood of any adhesive residue being left behind. Always pull the wrap parallel to the surface rather than up and away, which can increase the risk of damaging the paint.
If you encounter stubborn adhesive remnants after the wrap is removed, avoid aggressive scrubbing. Instead, use a gentle adhesive remover that’s safe for automotive use. Apply it with a soft cloth to dissolve the residue without harming the paint. Always test any product on a small, inconspicuous area first.
Finally, inspect the car’s paint after removal. Look for any signs of damage or areas that need extra attention. If any issues arise, consult a professional detailer to restore the paint to its original condition.

