


For car enthusiasts, maintaining the pristine condition of their vehicle’s interior is as crucial as the exterior detailing. A clean and well-organized interior not only enhances comfort but also showcases your dedication to vehicle care. In this guide, we will explore various DIY tips specifically designed for effective interior detailing.
From upholstery cleaning techniques to dashboard treatments, these detailing tips will equip you with the knowledge to transform your car’s interior into a sanctuary. Whether you’re preparing for a car show or simply want to enjoy a cleaner ride, our step-by-step approaches will help you achieve professional-level results without the need for costly services.
By embracing the DIY spirit, you can customize your approach to detailing based on your car’s specific materials and your personal preferences. This not only saves money but also allows you to take pride in the work you accomplish. Let’s dive into the essential detailing practices that every car enthusiast should know.
Choosing the Right Products for Interior Surfaces
Selecting the appropriate products for your car’s interior surfaces is crucial for effective DIY detailing. Different materials require specific cleaners and protectants to ensure optimal results without damage.
For fabric upholstery, look for a gentle, pH-balanced cleaner that can effectively lift stains while being safe for daily use. Avoid harsh chemicals that can cause discoloration or deterioration. Always test the product on a hidden area first to ensure compatibility.
When it comes to leather, use a dedicated leather cleaner followed by a high-quality conditioner. This combination not only cleans but also preserves the material’s suppleness and prevents cracking. Look for products free from alcohol or dyes to maintain the leather’s integrity.
For plastic and vinyl surfaces, opt for a cleaner designed specifically for these materials. Avoid using all-purpose cleaners that may contain solvents damaging to these surfaces. A good protectant will enhance the appearance and provide UV protection to prevent fading.
Glass cleaner is another essential in the detailing toolkit. Choose a streak-free formula that can tackle fingerprints and smudges without leaving residue. Make sure it’s safe for tinted windows if your car features them.
Finally, consider investing in microfiber towels for application and buffing. These towels are gentle on surfaces and will not scratch, allowing you to achieve a flawless finish during your DIY detailing sessions.
Step-by-Step Guide to Cleaning Upholstery and Carpets
To achieve a pristine interior, cleaning upholstery and carpets is essential for car enthusiasts. Follow this detailed guide to ensure your vehicle’s interior looks and feels brand new.
Step 1: Gather Your Supplies
Collect all necessary materials including a vacuum cleaner, upholstery cleaner, carpet shampoo, soft brushes, microfiber cloths, and a spray bottle. Having everything on hand makes the process more efficient.
Step 2: Remove Loose Debris
Start by thoroughly vacuuming the entire area. Use appropriate attachments to reach between seats and in tight spots to eliminate dirt and crumbs. This step prepares the surface for deeper cleaning.
Step 3: Test Cleaning Solutions
Before applying any cleaner, test it on a small, inconspicuous area of the upholstery or carpet. This ensures that the cleaner does not cause discoloration or damage.
Step 4: Apply Upholstery Cleaner
Using a spray bottle, apply the upholstery cleaner according to the manufacturer’s instructions. Work the cleaner into the fabric with a soft brush, focusing on stained or heavily soiled areas. Allow it to sit for a few minutes to break down dirt.
Step 5: Blot Stains
After the cleaner has set, use a clean microfiber cloth to blot the fabric. Avoid rubbing, as this may damage the fibers. Instead, press gently to lift stains and excess moisture.
Step 6: Clean Carpets with Shampoo
For carpets, mix carpet shampoo with water in a spray bottle. Apply the solution evenly, working it into the fibers with a brush. Again, let it sit briefly before proceeding to the next step.
Step 7: Rinse and Extract
Use a wet/dry vacuum or clean water with a cloth to rinse out soap residues. Ensure that you are thoroughly removing all cleaning agents to prevent a sticky residue that attracts dirt.
Step 8: Dry the Area
Allow the upholstery and carpets to air dry completely. If possible, open windows and doors to promote airflow. This helps prevent mold and odors from developing.
Step 9: Final Touches
Once dry, give the upholstery a final vacuum to lift any flattened fibers. For carpets, a carpet rake can help revive texture. Consider using a fabric protector to keep your interior looking pristine longer.
By following this step-by-step guide, DIY enthusiasts can maintain a clean and inviting car interior, enhancing the overall driving experience.
Maintaining and Protecting Dashboard and Console Materials
The dashboard and console materials in your vehicle are often exposed to sunlight, oils, and dirt, making them susceptible to fading, cracking, and damage. To keep these areas looking pristine, it’s essential to adopt a regular DIY detailing routine. Start by selecting the right cleaning products that are specifically formulated for the surface materials of your dashboard and console, whether they are plastic, vinyl, or leather.
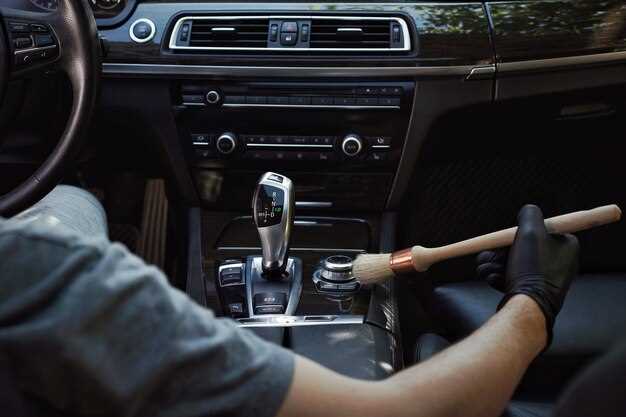
Begin the detailing process by removing any loose debris and dust using a soft microfiber cloth or a vacuum with a brush attachment. This prevents scratching during the cleaning process. Next, apply a gentle cleaner to a microfiber cloth and work it into the surfaces, paying close attention to any crevices or textured areas where dirt can accumulate.
Once the surface is clean, consider applying a protectant designed for your material type. For plastic and vinyl, a UV protectant can help shield against sun damage and cracking. If you have leather components, use a leather conditioner that nourishes and protects while keeping the material supple and flexible.
It’s important to note that excessive heat can damage dashboard materials, so park your vehicle in shaded areas whenever possible. Using a sunshade can also minimize heat buildup and protect against UV rays. Regular detailing, combined with protective measures, will help maintain the appearance and longevity of your dashboard and console materials, ensuring they remain in excellent condition for years to come.

